 Here's what you need:
- a board 6 inches wide and 5 feet long; the wood should be of a kind you can easily cut and nail or screw, and it's best if it's weather resistant (like cedar)
- saw
- ruler and/or yardstick
- pencil
- hammer & nails or wood screws
- very helpful but not absolutely necessary is a drill with an adapter enabling you to saw the circular 1½-inch-wide entrance hole
- what's shown below:
This design is so simple that basically you can just look at the above drawing and the cutting patterns at the left, and figure out most of what you need to do. The entrance hole is 1½-inch across. Having everything ready, it takes about an hour to construct the whole thing.
In the top drawing, notice how the front is held in place by nails or screws fastening the top of the front to the sides, so the front can be swiveled upwards from the bottom. This enables you to clean out old nests at the end of each season, so that over the years parasites don't build up inside the box. Alternately you may want to loosely fit the top with short nails or screws so entry from the box is by removing the roof.
If there's no drill attachment enabling you to cut the 1½-inch-wide entrance hole, just gnaw at it with wood chisel. Birds don't need perfectly smooth-edged round holes.
The floor should have holes for water to drain out. You may want to cut the floor's corners before nailing it in, or maybe drill holes in it. Just remember the drainage problem, and don't make a holes so large that snakes might squeeze through them.
The nest should have ventilation, too. When nailing on the back, make sure that between the back and the roof a space of about ¼-inch width is left. Again, you don't want larger holes or snakes will have easy entrance.
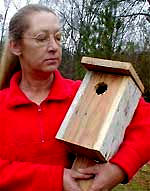
Mount nest boxes 4 to 6 feet above the ground on a metal or wooden post. Place your box in an open grassy area with widely scattered trees and shrubs. To keep other birds such as wrens and sparrows from taking over the nest box, it's best to put the nest as far from buildings as possible.
It's best to equip the post with some kind of "predator guard" to keep snakes and rodents from climbing the pole.
All kinds of information and activities relating to bluebirds is available at the North American Bluebird Society Web site.